Now, fix a cup of tea or coffee, gather your supplies and you'll be ready to start this little project!
 First, gather the supplies and materials listed on the pattern sheet. Cut out pattern pieces. I use separate scissors (the orange handled ones) for cutting paper and the tiny ones for cutting the small pieces.
 I prefer those flat headed flower pins for my wool and woolfelt projects. They are more costly than regular pins but work so much better. And I never lose one of them!! You can find them at Michael's, JoAnn's, etc. I used woolfelt for this project. I prewash all my woolfelt. For this project, I wanted the fluffiness that comes with drying it in the dryer. Had I wanted a smoother, flatter finish all I would need to do is steam it flat with my iron. I prefer to cut each pincushion square individually. When cutting the tiny circles from lavender and the red comma shapes, I hold the tiny pattern pieces on the woolfelt between my thumb and index finger and just cut around them. Accuracy is not important. If you don't like the shape you cut, then cut another one. If the shape is too big, cut it down to size desired.
 Next, position all the pieces on one piece of the pink pincushion square. When you are satisfied with placement, then use gluestick (sparingly) and glue pieces in place. This technique means no pins get in your way and pieces won't slip as you stitch.
With the pieces glued in place, you are ready to begin stitching. I like to use the blanket stitch to outline my pieces but you may use whatever stitch you desire to secure the pieces. I have used embroidery floss in this example (3 strands for embroider of pickle, etc. and 4 strands for outer rim of pincushion) but you can also use Perle cotton. In the photo above, I have already completed the stitching on the pickle. I added some running stitches on the pickle to indicate the lines you see on real pickles. Next I am stitching the tiny circles in place. In the photo below, you can see a close-up of how I stitch these. Notice that the pin is securing my first loop and so when I am done stitching all the way around the circle, I will just insert my needle where the pin is and you will not be able to tell where the initial stitching was begun. Oh, and here and now I must apologize, as I have been told that I buttonhole stitch the wrong way but it's how I learned from my mother and she learned it from Mary Dellechiesa in the 1940's. It worked for them and it works for me, so I am not about to change now!!

Working with woolfelt is like stitching through butter. I just love sewing on it. Wool is nice, too, but woolfelt is often thicker and it never frays.
 So, all the stitching is done on the top piece of the pincushion. It's ready to have the back piece added.
 Match up your two pink pincushion squares and pin together as shown in photo above. Again, I use that "pin in the loop" technique so that one cannot tell where my stitching begins and ends.
 In the photo above, you can see a close-up of the way I begin stitching the two pincushion squares together. You will stitch around three sides and then you'll be ready to stuff the pincushion.
 I see that I forgot to list fiberfill on the supply list on the pattern sheet but most of us have a bit of that in our sewing rooms. The washer may be in your husband's workshop (if he has one) or head to the hardware store for one. They are very inexpensive and provide a great solid, heavy base for your pincushion. Stuff the pincushion firmly, making sure to fill each corner, too.
 When the pincushion is almost completely stuffed, insert the washer at the bottom of the pincushion. Sometimes, I stitch batting around the washer - as shown above - so that it does not wear through the woolfelt. My advice is that if this is a pincushion that will get heavy use, add the batting cover. If it's "just for looks", it's not necessary.
 Your pincushion is almost finished. Using those long pins, pinch the opening closed and secure with pins. Finish buttonhole stitching along the last edge. I don't use knots but instead secure the thread by stitching in between the layers, first one direction, then back and then back again. This way you can hide your stitches, no lumps from knots and I have never had a project come undone!
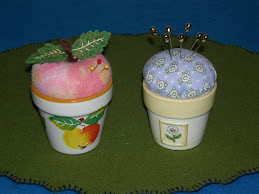
 Here's the finished project with pins in place and ready for use.
 And if it's "just for show" well, here you go - it's ready to add to your pincushion collection!!
Hope you have enjoyed this little pincushion project. There is, of course, a story behind the pincushion and that will come later this evening. Time to take a break and head out to a library meeting. There are more pincushion projects planned for the future so do come back again!!!
Sandi


12 comments:
I like your pickle!!! I never thought I'd say THAT in blogland, lol!
Now, that's one cute pickle! Thanks for your creative design.
HelenMarie
What a fun pincushion. Your pins will be in quite the pickle. hee hee.
What a cute "pickle" to be in. Pun intended!!
Susan
I'm just about to make this pin cushion, but the pattern page you provided doesn't transfer well to my files. Could you please email me a PDF version? Thanks Sandi
melissa266(@)gmail(.)com
I just think that is the cutest thing! I'm glad you put a tutorial. Maybe i can get supplies and make it. Thanks for sharing. HUGS
Adorable pincushion ! Thank you for sharing it with us!
I always love pincushion and love yours too. Thanks for sharing.
I just found your blog and love all these pincushions! Thanks for sharing! Can you tell me what the "pin in the loop technique" is that you are using for this one?
dfuller55 at verizon dot net
Sandi, this is to cute! I don't have any wool felt, just acrylic, but if I have the right colors. I am going to make one of these this week.
how cute! I'm glad I found this pincushion blog. lately I've been intriged by pincushions
I love this cute little pickle. Just shows that it is fun to be in a pickle some days! (or pickle mood) lol Love your great details to help us improve our skills.
Post a Comment